A Modern Transformation
So lately I had been finding a need for more mobile furniture for my living room. I have a fairly open concept space so it's tough to divide the room into a living room, dining area and seating area. I found a few different pieces on Kijiji and decided on these for the low price of $70 for both pieces. They are solid oak and super sturdy, which is great!
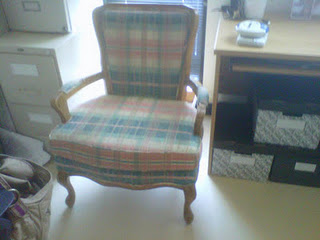
Clearly, the pink and blue/green plaid fabric was not a fabric choice I was looking for and these were not in the best shape, however, they were exactly what I was looking for and how can I complain about living room seating for under $100 total? I decided to paint them white to match my white and cream with turquoise and blues in the living room and to freshen things up a bit and add more fabric.
I then bought a sponge sander for $5 at Home Depot and then bought a paint and primer in one (you only need a small can for something of this size, I still have over half a can left). By purchasing the paint and primer in one you're saving time and money. The small can was only $7 as opposed to $15 for the large can. Then I went to Fabricland for the fabric. I wanted something thick and sturdy since reupholstering needs thick fabric. Their stuff is so cheap and they often have sales such "buy 1 yard of fabric, get one free" and so on, so for this I bought 6 yards for the two pieces and there was plenty left over. I only had to pay for 3 yards with the sale so the total came to just over $15 which is awesome! I also bought the studded accents there for $2 a pack with twenty five in them so I ended up needing about 5 packs. They are almost like thumbtacks so you can nail them into the fabric and wood. I later found out you can also easily use the silver thumbtacks from the dollar store. There are more per pack and they are only a dollar!
Materials:
So basically I just sanded down the wood with the sponge just a bit to help the paint stick better considering the wood was a thick finish and then started painting. They only needed two coats of paint. Then I cut out the fabric to reasonably similar sizes to the furniture and simply covered it, folded in the edges so you couldn't see any fraying and such and then nailed down the fabric into the wood to hold it in place and it also looks nice with the accents too, I think. In retrospect, I likely would have done a more slick, clean line looking job with a staple gun to hold down the material and would have taken the time to take the seat off the bench and stapled the fabric underneath so the edges didn't show, but I like the way it looks overall :)
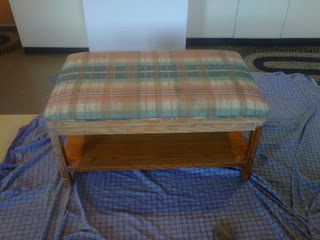
The bench with one coat of paint in progress...
I then bought a sponge sander for $5 at Home Depot and then bought a paint and primer in one (you only need a small can for something of this size, I still have over half a can left). By purchasing the paint and primer in one you're saving time and money. The small can was only $7 as opposed to $15 for the large can. Then I went to Fabricland for the fabric. I wanted something thick and sturdy since reupholstering needs thick fabric. Their stuff is so cheap and they often have sales such "buy 1 yard of fabric, get one free" and so on, so for this I bought 6 yards for the two pieces and there was plenty left over. I only had to pay for 3 yards with the sale so the total came to just over $15 which is awesome! I also bought the studded accents there for $2 a pack with twenty five in them so I ended up needing about 5 packs. They are almost like thumbtacks so you can nail them into the fabric and wood. I later found out you can also easily use the silver thumbtacks from the dollar store. There are more per pack and they are only a dollar!
Materials:
- Chair or bench (or whatever surface piece you want!)
- 3 yards of fabric
- Scissors
- Paint and primer
- Studded accents (5 packages)
So basically I just sanded down the wood with the sponge just a bit to help the paint stick better considering the wood was a thick finish and then started painting. They only needed two coats of paint. Then I cut out the fabric to reasonably similar sizes to the furniture and simply covered it, folded in the edges so you couldn't see any fraying and such and then nailed down the fabric into the wood to hold it in place and it also looks nice with the accents too, I think. In retrospect, I likely would have done a more slick, clean line looking job with a staple gun to hold down the material and would have taken the time to take the seat off the bench and stapled the fabric underneath so the edges didn't show, but I like the way it looks overall :)
The bench with one coat of paint in progress...

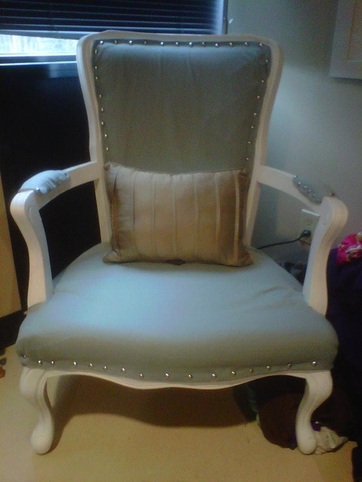
The chair and bench final product (minus that I've since added some more silver studded accents, more on that later) and even better, it has a storage area underneath which of course, I LOVE!
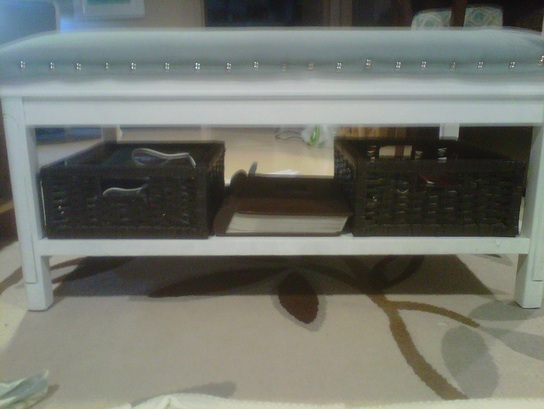
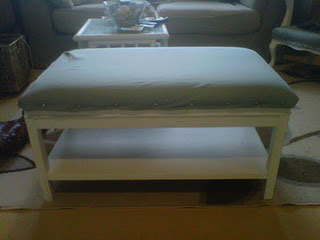
Above is the bench final product. I have since added more studded accents so they are less far apart and looks more like a studded outline for the whole bench. I would also recommend having two people around to do this project personally just because it would be nice to have one person holding the fabric flush against the bench while the other nailed it down tightly, I think it might look more polished that way.
I love these pieces! The fabric was fairly thick and this took a few hours to complete but I think it was well worth it, and for a first project and tackling the ever so tricky reupholstery, I am proud and happy with the end result! (Note, the blanket on the floor in the next photo is a painting sheet, not a carpet ;)
I love these pieces! The fabric was fairly thick and this took a few hours to complete but I think it was well worth it, and for a first project and tackling the ever so tricky reupholstery, I am proud and happy with the end result! (Note, the blanket on the floor in the next photo is a painting sheet, not a carpet ;)
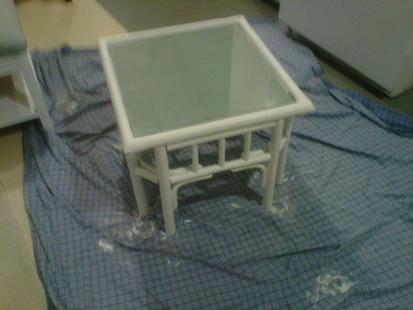
My apologies for lack of before photos on this table, but this table was a rattan, lacquer covered look with a glass top. It was a used table that I already had but it really wasn't working with the dark wood and new white and light furniture. So I covered it with several layers of paint (oh my, I might have put on about seven layers of paint and it still leaves something to be desired). I then took the glass top and traced the size out on the same blue fabric as the chair and bench and cut it out to put under the glass top. I think now it looks a lot more modern and less of a cottage look. It really ties in well with the new furniture!
