Check back to this page frequently for new posts on projects to come! Sorry for the poor quality photos...a digital camera is on my Christmas wishlist!
From Beige to Beauty
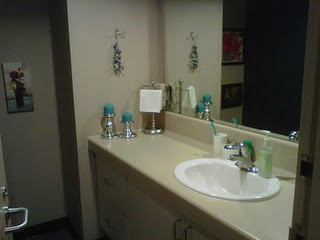
My bathroom was looking a little drab even though I had just bought some great silver metallic pieces to give it a little bit more of a fancy feel that I was looking for. I live in an apartment where I can't paint, but can wallpaper so I decided that was the best option and then I came across this wallpaper, I knew it was exactly what I was looking for the turquoise/blue colour that can be seen throughout my apartment, and the metallic that I was looking for to draw in all of the accessories.
Thanks to my handy dandy boyfriend, this project definitely took under an hour and was really easy to do. The total was only $20 thanks to the sale on the wall paper.
We simply followed the instructions and immersed sections of the wall paper into a big bucket filled with room temperature water and stuck it on the wall where we wanted it, and smoothed out with a sponge to get rid of bubbles.
Here is a photo of the plain beige bathroom before:
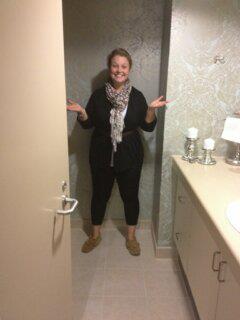
And here is the finished product with wallpaper :)
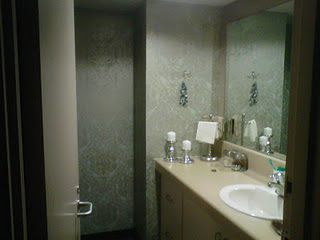
I love it! I think it makes it a lot more lively and looks a lot more luxurious!
Thankfully, I also got a new tile floor rather than the previous laminate a couple weeks later! I love my bathroom!
A modern transformation
So lately I had been finding a need for more mobile furniture for my living room. I have a fairly open concept space so it's tough to divide the room into a living room, dining area and seating area. I found a few different pieces on Kijiji and decided on these for the low price of $70 for both pieces. They are solid oak and super sturdy, which is great!
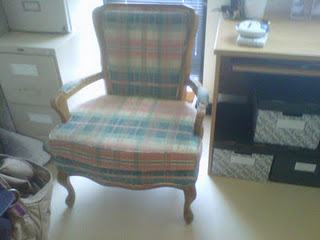

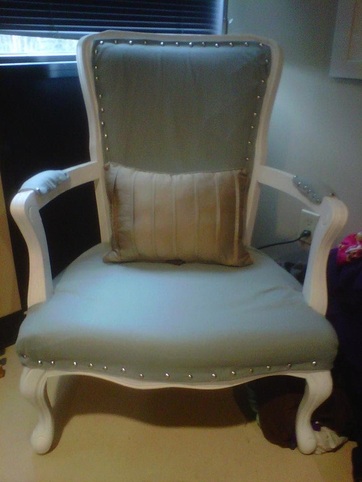
Clearly, the pink and blue/green plaid fabric was not a fabric choice I was looking for and these were not in the best shape, however, they were exactly what I was looking for and how can I complain about living room seating for under $100 total. I decided to paint them white to match my white and cream with turquoise and blues in the living room and to freshen things up a bit and add more fabric.
I then bought a sponge sander for $5 at Home Depot and then bought a paint and primer in one (you only need a small can for something of this size, I still have over half a can left). By purchasing the paint and primer in one you're aving time and money. The small can was only $7 as opposed to $15 for the large can. Then I went to Fabricland for the fabric. I wanted something thick and study since reupholstering needs thick fabric. Their stuff is so cheap and they often have sales such buy 1 yard of fabric, get one free and so on, so for this I bought 6 yards for the two pieces and there was plenty left over. I only had to pay for 3 yards with the sale so the total came to just over $15 which is awesome! I also bought the studded accents there. for $2 a pack with twenty five in them so I ended up needing about 5 packs. They are almost like thumbtacks so you can nail them into the fabric and wood. I later found out you can also easily use the silver thumbtacks from the dollar store. There are more per pack and they are only a dollar!
Materials:
So basically I just sanded down the wood with the sponge just a bit to help the paint stick better considering the wood was a thick finish and then started painting. They only needed two coats of paint. Then I cut out the fabric to reasonably similar sizes to the furniture and simply covered it, folded in the edges so you couldn't see any fraying and such and then nailed down the fabric into the wood to hold it in place and it also looks nice with the accents too, I think. In retrospect, I likely would have done a more slick, clean line looking job with a staple gun to hold down the material and would have taken the time to take the seat off the bench and stapled the fabric underneath so the edges didn't show, but I like the way it looks overall :)
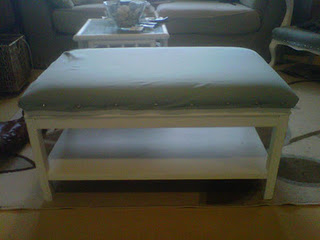
The bench with one coat of paint in progress...
I then bought a sponge sander for $5 at Home Depot and then bought a paint and primer in one (you only need a small can for something of this size, I still have over half a can left). By purchasing the paint and primer in one you're aving time and money. The small can was only $7 as opposed to $15 for the large can. Then I went to Fabricland for the fabric. I wanted something thick and study since reupholstering needs thick fabric. Their stuff is so cheap and they often have sales such buy 1 yard of fabric, get one free and so on, so for this I bought 6 yards for the two pieces and there was plenty left over. I only had to pay for 3 yards with the sale so the total came to just over $15 which is awesome! I also bought the studded accents there. for $2 a pack with twenty five in them so I ended up needing about 5 packs. They are almost like thumbtacks so you can nail them into the fabric and wood. I later found out you can also easily use the silver thumbtacks from the dollar store. There are more per pack and they are only a dollar!
Materials:
- Chair or bench (or whatever surface piece you want!)
- 3 yards of fabric
- Scissors
- Paint and primer
- Studded accents (5 packages)
So basically I just sanded down the wood with the sponge just a bit to help the paint stick better considering the wood was a thick finish and then started painting. They only needed two coats of paint. Then I cut out the fabric to reasonably similar sizes to the furniture and simply covered it, folded in the edges so you couldn't see any fraying and such and then nailed down the fabric into the wood to hold it in place and it also looks nice with the accents too, I think. In retrospect, I likely would have done a more slick, clean line looking job with a staple gun to hold down the material and would have taken the time to take the seat off the bench and stapled the fabric underneath so the edges didn't show, but I like the way it looks overall :)
The bench with one coat of paint in progress...

The bench final product (I've since added some more studded accents, more on that later). Even better, it has a storage area underneath which I LOVE!
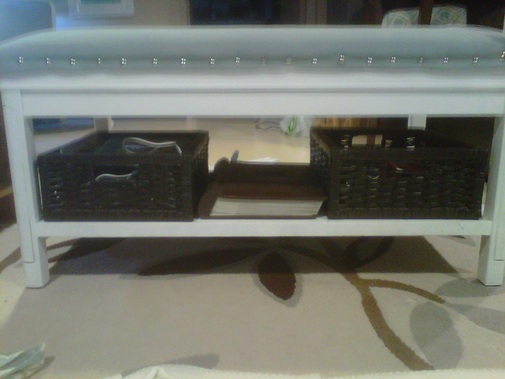
Here is the bench final product (sorry for the laundry pile beside the chair...oh Saturdays!). I have since added more studded accents so they are less far apart and looks more like a studded outline for the whole bench. I would also recommend having two people around to do this project personally just because it would be nice to have one person holding the fabric flush against the bench while the other nailed it down tightly, I think it might look more polished that way.
I love these pieces! The fabric was fairly thick and this took a few hours to complete but I think it was well worth it, and for a first project and tackling the ever so tricky reupholstery, I am proud and happy with the end result! (Note, the blanket on the floor is a painting sheet, not a carpet ;)
I love these pieces! The fabric was fairly thick and this took a few hours to complete but I think it was well worth it, and for a first project and tackling the ever so tricky reupholstery, I am proud and happy with the end result! (Note, the blanket on the floor is a painting sheet, not a carpet ;)
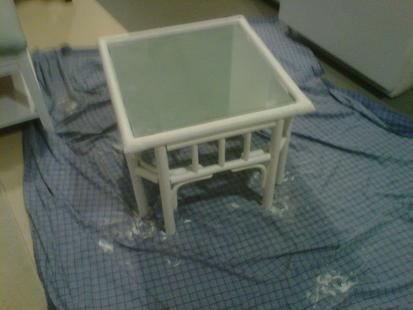
My apologies for lack of before photos on this table, but this table was a rattan, lacquer covered look with a glass top. It was a used table that I already had but It really wasn't working with the dark wood and new white and light furniture. So I covered it with several layers of paint (oh my, I might have put on about seven layers of paint and it still has something to be desired). I then took the glass top and traced the size out on the same blue fabric as the chair and bench and cut it out to put under the glass top. I think now it looks a lot more modern and less of a cottage look. It really ties in well with the new furniture!
Backsplash on a budget
Living in an apartment doesn't leave many options for painting or adding any permanent fixtures. I decided to get a little creative in adding some personality to my beige kitchen (see the beige to beauty theme here?). I have this great area where i put my wine and cocktail glasses and some pasta jars and I thought this was the perfect small area to start. I just had to figure out what to do with it...
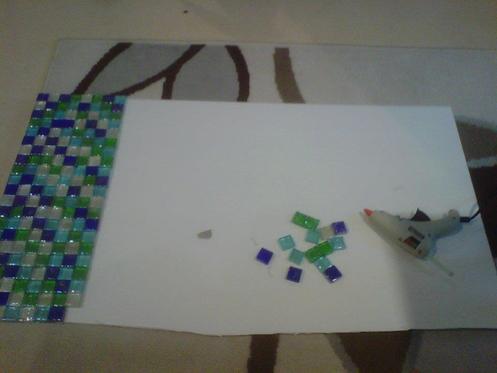
I got inspired when I went to Michael's to pick up some stuff for another craft (more on that later) and saw small packages of glass tile. I loved the colours and decided to make a mobile backsplash that wouldn't need to be glued to the wall at all. I purchased three packages of it using a 40% off coupon that you can find online by searching "Michael's printable coupons". This whole project only cost me in and around $20 dollars. The packages of tile were $3.40 with tax and with the 40% coupon, I kept the cost down to a minimum. I got lucky one day when they also had a 25% sale too! I used about 10 packages of the tile (may have been nine).
Materials:
I decided as a backing for the tile to go on to, I would use a piece of form board that I purchased at the dollar store for $2 because it would be solid enough to hold the tile and would stand up on its own. I traced an outline of how large roughly the area I wanted to put tile on would be and cut it out. I started putting down the tiles in a pattern, but the colours of the tiles weren't consistent in each bag so I just tried my best to keep it varied.
I got inspired when I went to Michael's to pick up some stuff for another craft (more on that later) and saw small packages of glass tile. I loved the colours and decided to make a mobile backsplash that wouldn't need to be glued to the wall at all. I purchased three packages of it using a 40% off coupon that you can find online by searching "Michael's printable coupons". This whole project only cost me in and around $20 dollars. The packages of tile were $3.40 with tax and with the 40% coupon, I kept the cost down to a minimum. I got lucky one day when they also had a 25% sale too! I used about 10 packages of the tile (may have been nine).
Materials:
- Foam Board
- 10 tile packages (this varies depending on the size of the area)
- Glue gun
- That's it!
I decided as a backing for the tile to go on to, I would use a piece of form board that I purchased at the dollar store for $2 because it would be solid enough to hold the tile and would stand up on its own. I traced an outline of how large roughly the area I wanted to put tile on would be and cut it out. I started putting down the tiles in a pattern, but the colours of the tiles weren't consistent in each bag so I just tried my best to keep it varied.
This took quite a while since I needed to glue down each piece individually, but I think it was totally worth it!
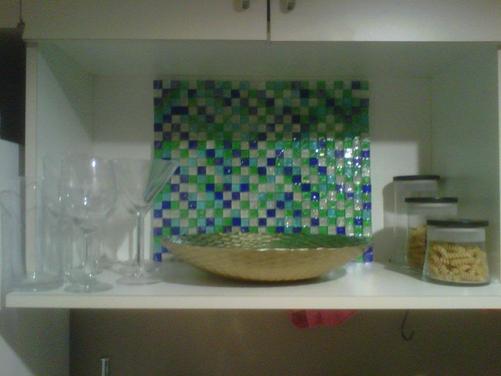
The finished product! The only thing I would change would be to make it bigger! Maybe one day....
Modern Magazine Rack
I saw this photo on Domestic Imperfection's blog and knew I had to do it! http://domesticimperfection.blogspot.com/2011/09/triple-book-slings.html
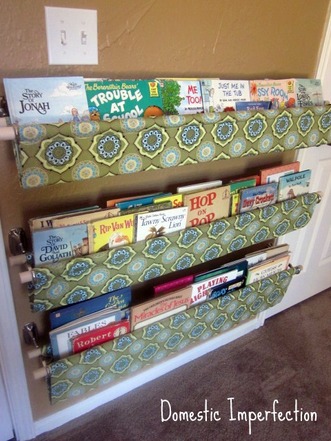
I knew I didn't have the wall space for three, but thought one would be fun for a blank area of wall space in my living room seating area. I purchased 2 wooden dowels from Home Depot for only $3 each and then purchased two wall hanging brackets to hold them on for $3.50 each as well. I purchased the material from Fabricland. It seemed a little expensive at first ($25 a yard!!!) but I found out it was on the 60% off shelf so it was only about $10 for a yard and I have tons leftover for a later project. I picked the lattice material because I found it to be modern but classic and the colour was relatively neutral.. If they had it in turquoise I would have snatched it up, but I still liked it the best!
Materials:
Materials:
- Half a yard of fabric
- Scissors
- Hot glue gun
- 2 wooden dowels
- Hammer and screw driver
- Screws and plugs
- Wall bracket x 2
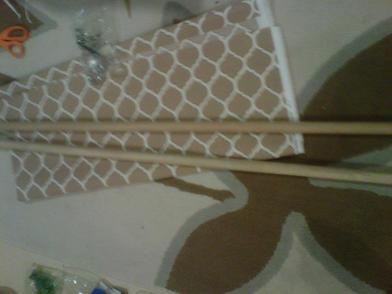
I cut the yard of fabric in half lengthwise. Then I put the pattern side down and put the dowels on top of it, one on each side about 5 inches towards the inside. Ideally, you would fold over the over the fabric and sew it into place so that it holds, but instead, I used a hot glue gun to hold the fabric in place. It has been holding up very well so if you're not an avid sewer, don't worry, there's an alternative! I let it dry overnight and then put up the brackets the next day.
They ended up a little uneven (this is the first time I've ever put plugs and screws in a wall to be honest), but it wasn't too too bad. Then I just hung the dowels over the brackets and VOILA! I put the magazines into the rack and a mini panic attack. Even though I had measured the length of the rack to fit a magazine, it was still a little bit too big and the magazine wasn't really showing because the pockets were too deep.
I stuffed the bottom of the pocket with an old tablecloth I had around to lessen the depth and it worked great!
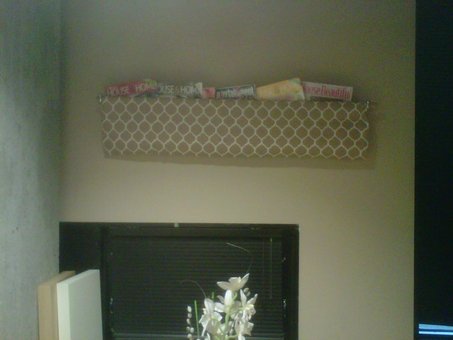
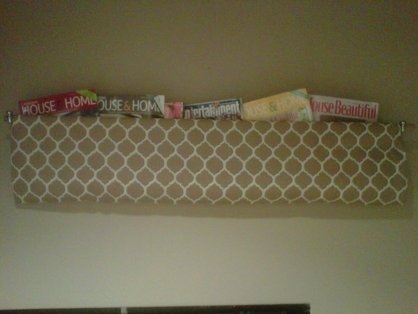
I love the final product! So fun and practical too!
Classic Corkboard with a twist
The window in my bedroom is large, which is great, but it also has a large metal empty space underneath it which was kind of blank, dull space. I decided to make a practical use of the space and turn it into a fabric covered corkboard!
There's a lack of pictures for this project because to be honest, I totally forgot and it was a very last minute project!
Materials:
This is a really simple and inexpensive way to spruce up a room. I bought one yard of fabric from Fabricland. This fabric is great because it goes perfectly with the colour scheme of my bedroom and it is also reversible with different colours on the back which is neat.
To start, I flipped the fabric with the pattern side down. I laid out the 6 cork board pieces side by side and used hot glue to stick them all together. I had to cut the bottom cork boards so that it would perfectly fit the space under the window. Then, folded the fabric like a wrapped present, folding at the corners, and used hot glue to hold it in place. I then just used simple white sticky tape to hold it up on the wall.
There's a lack of pictures for this project because to be honest, I totally forgot and it was a very last minute project!
Materials:
- 6 12 x 12 Cork boards from the Dollar store ($3, sold in 2's)
- Hot glue gun
- Scissors
- 1 yard of fabric ($10)
This is a really simple and inexpensive way to spruce up a room. I bought one yard of fabric from Fabricland. This fabric is great because it goes perfectly with the colour scheme of my bedroom and it is also reversible with different colours on the back which is neat.
To start, I flipped the fabric with the pattern side down. I laid out the 6 cork board pieces side by side and used hot glue to stick them all together. I had to cut the bottom cork boards so that it would perfectly fit the space under the window. Then, folded the fabric like a wrapped present, folding at the corners, and used hot glue to hold it in place. I then just used simple white sticky tape to hold it up on the wall.
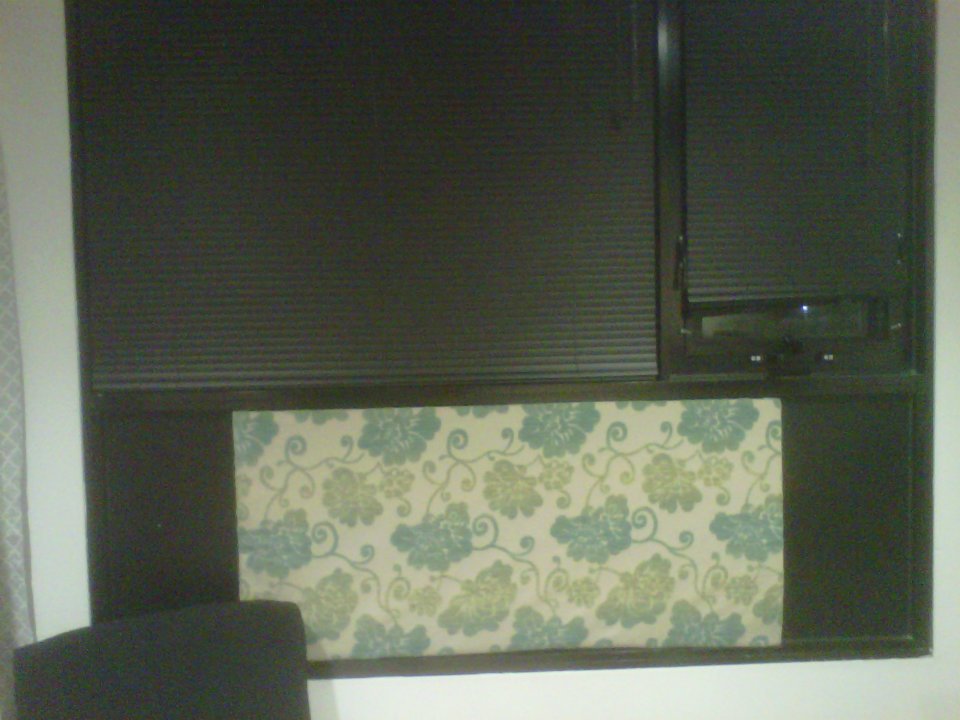
I think this is a great project for anyone, especially in an office or bedroom because it's not only practical but stylish!
Modified Mason Jars
I saw this mason jar soap dispenser idea on several blogs and loved it! Such a great idea to repurpose something (which I'm a huge fan of because these things tend to be FREE). I got these Mason jars from my boyfriend Jeremy's mom and decided to try it out! I liked this mason jar the best from all of the blogs: http://revamphomegoods.blogspot.com/2011/10/dear-pinterest-challenge-accepted.html
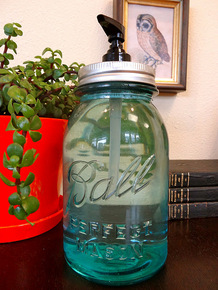
I like the turquoise look of it (of course), but I really like the silver top (most are gold). This is another pretty simple project with only a few small steps and can really give a cool, unique look to a bathroom or kitchen.
Materials:
This is the original mason jar:
Materials:
- Mason jar
- Soap
- Soap pump (I used one from a bottle I already had but you can buy new ones at most craft stores)
- Silver spray paint (or colour of your choice)
- Nail and hammer
This is the original mason jar:

To create the hole in the top of the lid, I just took a nail and used a hammer and simply punctured through the top of the lid several times creating a hole. It doesn't have to be perfectly circular, just large enough to fit the pump in it. I decided to spray paint the top silver to match the silver accents in my bathroom:
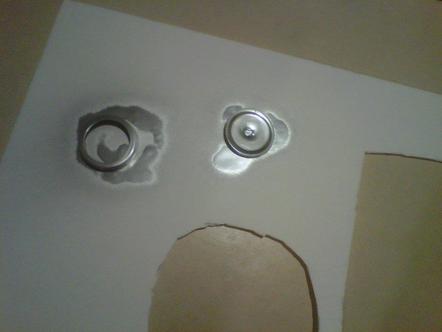
I let it dry overnight. In the meantime, I took my old soap dispenser (just a typical Bath and Body works container) and poured out the soap into the mason jar and then cleaned off the pump, put the lid on jar and put the end of the pump through the hole.
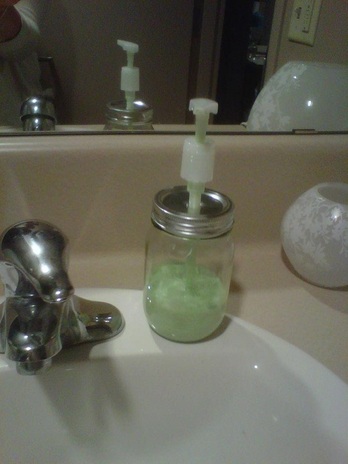
I really like the way it came out and matches nicely with the bathroom. I think the next soap I put in will be turquoise in colour so that it matches even better :)
Earrings, Necklaces, Bracelets..Oh my!
I don't have tons of jewelry but the few that I do have often get tangled up in each other and I don't really have any sort of jewelry box, so when I saw Jewlery organizers all over blogs, I figured I could do one of my own for my bathroom where I typically keep my jewelry. Jeremy's mom found some old frames in her basement that were absolutely beautiful. With all the DIY I've been doing lately she though I could use them and I sure could!
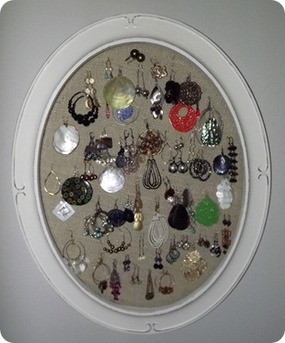
My inspiration was my favorite photo for a jewelry organizer:
My inspiration was my favorite photo for a jewelry organizer:
Materials:
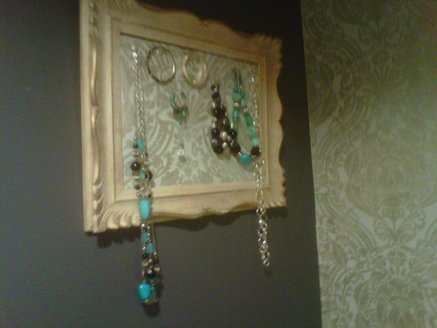
To start, I cut out the cork board to fit the size of the frame. Then I laid some of the leftover wallpaper face down and put the cork board on top. I folded down the corners and used hot glue to hold the wallpaper onto the cork board. Then I simply slipped the cork into the frame just like a typical photo frame backing and taped it on to secure it on the back.
Then I hung it up on the wall, put some push pins in certain spots that worked for me and hung up my favourite jewelery pieces!
TADA!!!
- Frame (free!)
- Cork board (I had leftover but only $2 at the dollar store for two boards)
- Wallpaper (leftover, but you could use leftover fabric, burlap, plain cork, anything you want!)
- Push pins
- Hot glue gun
- Scissors
To start, I cut out the cork board to fit the size of the frame. Then I laid some of the leftover wallpaper face down and put the cork board on top. I folded down the corners and used hot glue to hold the wallpaper onto the cork board. Then I simply slipped the cork into the frame just like a typical photo frame backing and taped it on to secure it on the back.
Then I hung it up on the wall, put some push pins in certain spots that worked for me and hung up my favourite jewelery pieces!
TADA!!!
Sorry again for the terrible photo quality! A new camera is on the Christmas wishlist for me!
Modern Magnetic Memo board
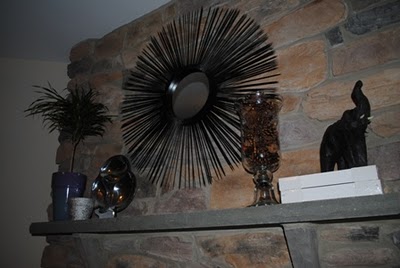
Sunburst mirrors seem to be extremely popular in the blogging world. I really like the look of them, it seems super modern which I love (in case you haven't caught on, I love the look of modified vintage/antique looking things and modern fixtures, such a cool contrast, I think). But I had an inspired moment when I saw a plain white memo board at the dollar store and decided instead of a sunburst mirror, I would make a sunburst magnetic memo board.
Here is the inspiration from http://adventures-in-diy.blogspot.com/2011/10/sunburst-mirror.html
Here is the inspiration from http://adventures-in-diy.blogspot.com/2011/10/sunburst-mirror.html
Another (super) cheap project for a little funky look in your room or office even.
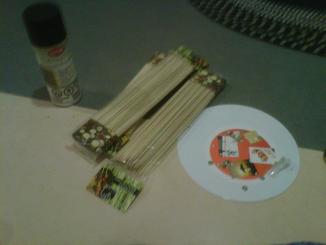
Materials:
Materials:
- Magnetic memo board ($1.25)
- 1 pack of BBQ skewers ($1)
- Hot glue gun
- Spray paint ($5, but mine was leftover, again :)
- Silver accent pieces (already had these. I had a bracelet with these pieces that broke recently so I decided to repurpose them as accents to give it a more glam look)
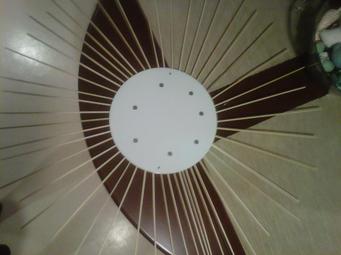
I started by flipping the memo board over, face down and got to glue gunning. This took a surprisingly long amount of time (maybe an hour). I had purchased three packs of skewers thinking I would use them all, but the back of the memo board got kind of crowded and I didn't want the front to look the same. I tried to make every other skewer look short and every other look long, but it was tricky not to overlap over other skewers on the other side. So this is the outcome once I let the glue set overnight (the silver pieces on it are magnets).
Then all that was left to do was spray paint. I decided on a bright turquoise for this one since it's a funky piece, it deserves a funky colour. I let it dry overnight and here's the final product:
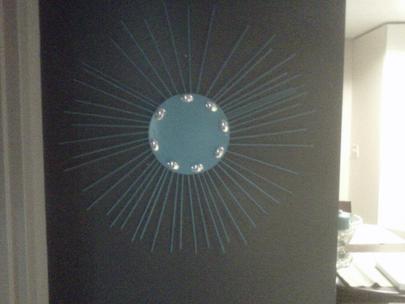
The picture doesn't so it justice, but I just love it! I think it's so neat! A couple of the skewers were coming loose the this point so I had to take it off and resecure them so it looks even better now :) Beggs thinks it's "interesting" (polite for weird) but I think it's a unique accent piece (and a conversation piece too!)
Clothespin Calendar
Well, anyone who knows me knows I'm relatively organized and sleep with my agenda/planner beside me (that's an exaggeration but I really do carry it with me everywhere) and don't know what I'd do without it.
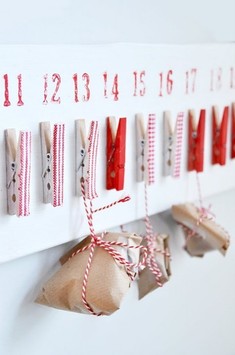
When I saw this neat advent calendar on http://www.consideringcampbell.com/2011/11/pinterest-challenge.html, I thought it would be a great idea to make something similar but use it as an actual calendar and hang pieces of paper on it with events under each date in my office (a stylish way to stay organized!)
When I saw this neat advent calendar on http://www.consideringcampbell.com/2011/11/pinterest-challenge.html, I thought it would be a great idea to make something similar but use it as an actual calendar and hang pieces of paper on it with events under each date in my office (a stylish way to stay organized!)
Now I had leftover "popsicle sticks" from a previous project (which shall remain nameless for Christmas present purposes), I decided to use them to create the backing for the calendar rather than the large piece of plywood.
Materials:
Materials:
- Craft sticks (pack of 100 for only $2 at the dollar store, with plenty leftover, hence this project)
- Clothes pins (pack of $50 for $1.25 at the dollar store)
- Spray paint (two colours)
- Scrap paper
- Hot glue gun
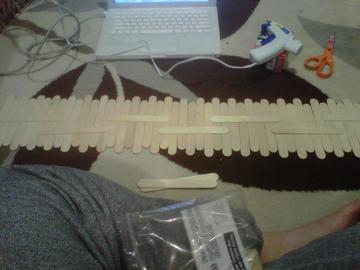
So I lined up the sticks (one higher then the other in a pattern) out on the ground. Then I took other sticks, put tons of hot got on them, and then simply put them overtop of the sticks to stick them all together rather than hot gluing each and ever stick to the one beside it. I let the glue dry and then spraypainted the front side with white spray paint (my office has a black and white damask theme as opposed to the turquoise and blue light feel of the rest of my apartment). I then spray painted all of the clothes pins black.
I used the hot glue gun to glue on the clothes pins to the wood sticks. I then cut out little pieces of damask paper I had lying around from a scrapbooking booklet of paper and cut them into squares for the numbers (dates) for the Calendar. I also had some cut little accents from a scrapbooking bag I had lying around and used that to spruce up the sides of the calendar. I then glued everything on and this was the final product:
I used the hot glue gun to glue on the clothes pins to the wood sticks. I then cut out little pieces of damask paper I had lying around from a scrapbooking booklet of paper and cut them into squares for the numbers (dates) for the Calendar. I also had some cut little accents from a scrapbooking bag I had lying around and used that to spruce up the sides of the calendar. I then glued everything on and this was the final product:
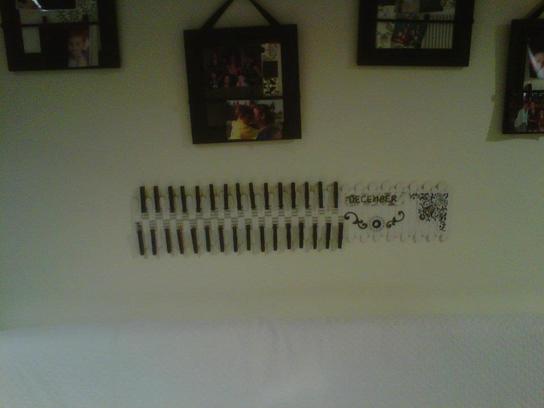
I still have to add the pieces of paper as dates clipped onto the clothes pins, but I think it's a cute little decorative piece to have in the office :)
A Chair to remember (or two)
Sorry, I couldn't resist the title for this project (An Affair to remember...anyone..Bueller?) Well, I found this amazing material that I instantly fell in love with while searching for the material for my fabric covered corkboard. I knew immediately what I wanted to do with it. I purchased this breakfast bar(ish) table and chair set so I could have some semblance of a dining area in the apartment. I decided to warm it up a bit and upholster the seats with this amazing fabric that went perfectly with the tone of the decor currently.
Materials:
Here is the chair before:
Materials:
- 1 yard of fabric (only $10 thanks to another sale at Fabricland)
- Scissors
- Chair cushion (on sale for $6 at Walmart, they were pretty awful but you never have to see them)
- Staple Gun and staples
- Hot Glue
- Chair (ya, I know you probably know this one but I thought I'd include it just in case)
Here is the chair before:
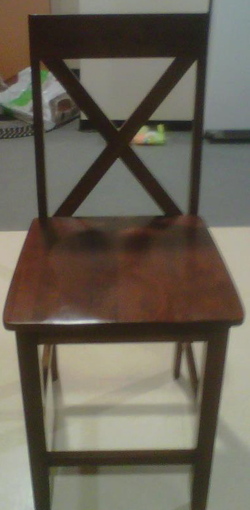
Basically I took the cushion and set it on the seat of the chair. I used a hot glue gun to keep it on the seat of the chair (this is definitely not how the pros do it, but it works) and then I flipped the chair upside down and used a staple gun to staple the fabric on the underside of the seat. I did this all around the seat of the chair, pulling the fabric flush against the cushion the whole time.
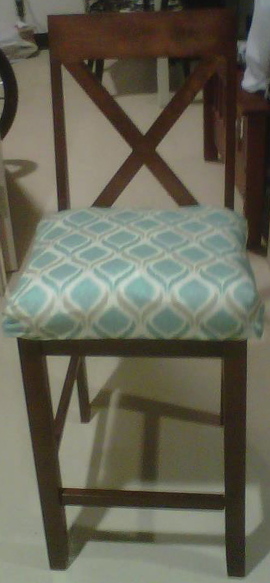
I really like the way it looks and they are much more comfy!
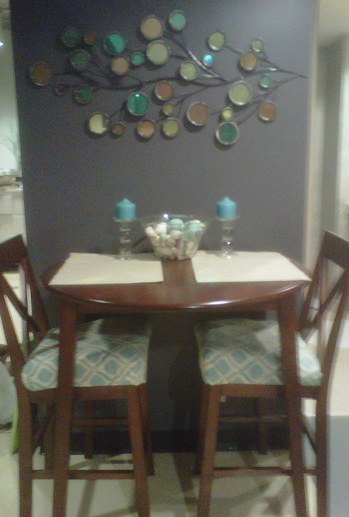
Here's the end result of the whole table :)
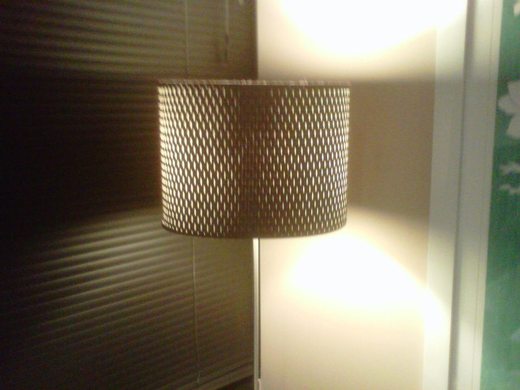
A Bright Idea...Revamped Lamp
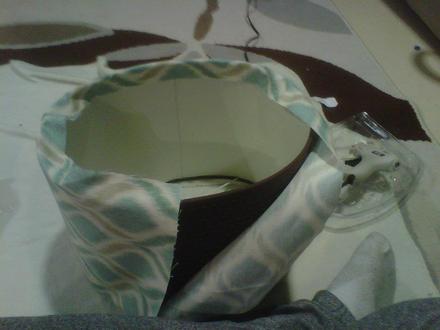
I've had this Ikea lamp for several years throughout University and it got a little beaten up in the process of several moves into residence. I love it, but it had some broken spots and when I had leftover fabric from my breakfast bar chair upholstery, I decided to put it into use and make this lamp like new again!
Here it is:
Here it is:
One of its several broken spots:
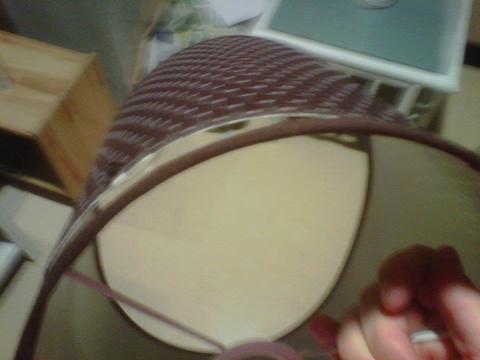
I wrapped the rest of the fabric around the lamp (it's nice that it is circular and can wrap around nicely as opposed to a cone shaped shade which will need a cutting template). I cut off the excess fabric and started gluing! This is such a great idea if you have a broken lamp, or just changed the colour scheme or decor in a room and want your lamp to match without hurting your wallet.
Materials:
Materials:
- Lamp
- Hot glue gun and glue
- Scissors
- Fabric (about a quarter of a yard, leftover, yay!)
I glued the edge of the fabric on the side of the lamp and then folded the edge of the un-glued side and glued that down as well. I folded the edges along the top and bottom of the lamp and began to glue them down along the edge as well. And that's it! Such a simple project and it only took about 10 minutes total.
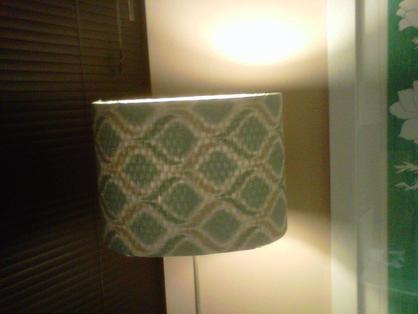
Here's the end result. I really like it! It ties in a lot of the colours in the room and I love the fabric just as much as when I first bought it and only a yard of it has come in handy for a few projects ! At first I wasn't too sure if I liked the idea of the previous lamp shade sort of showing through, but it's grown on me and I like how it let's the light out a lot better than the old brown shade did.

Here's what it looks like in the corner of the living room :) Much better!
